
This is a tutorial for making a comfy, modest pair of little girl panties. These panties are easy to make, are upcycled and earth-friendly.
One of the misnomers about thrift stores is that the donated clothing is worn out. The clothes are usually a collection of outgrown garments, clothes that went out of style, and then there are the clothes bought on a whim that have never even had the tag removed.
You will need at least one t-shirt…two if you want contrast bands. Look for t-shirts with a little spandex in them especially for the leg and waist band, 95% cotton and 5% spandex is a good blend. If there isn’t a content tag just stretch the fabric and see if it springs back or has memory. If you find a really nice shirt that is 100% cotton with no spandex you can use it for the body of the panties and use spandex fabric for the waist and leg bands.
Let‘s get started.

I started with a pair of panties that I picked up at the thrift store. Actually these are training pants (size 2) but they had a nice shape so I used them for my panty pattern. Cut the bands off the legs and the waist.

Set the leg and waist bands aside you’ll need them later on to use as a pattern. Cut the sides of your panties open so you can lay them flat. When you finish this step your panties should look like this.

Are you with me? Good! My panty pattern fit on the sleeve so I cut the sleeve off of the shirt and cut it open along the underarm seam. Lay the panties out on the fabric. If your pattern is a larger size and won’t fit on the sleeve just lay them out on the front or back of the shirt where the fabric area is larger.


Fold your panties in half lengthwise to see if the sides match. Trim if necessary. This is a forgiving pattern so don't worry if they aren't perfect. Just tidy them up and then let's carry on!

Cut open the leg and waist bands that you removed earlier lay them down without stretching, let’s start with the waist. My waist band measures 15 inches long, so I am going to cut the waistband 15 x 3.5 inches.

So go ahead and lay out the shirt with spandex in it and cut the waist band out. Your length may be different but the width will be 3.5 inches.

*Optional step: If your fabric is thin you may want to add a panty liner. If you do scroll to the bottom of the tutorial to see how to cut one out. After you cut it out come back to this paragraph to continue.
Now that the pieces are all cut out put the leg bands aside and let's start putting these sweet panties together.
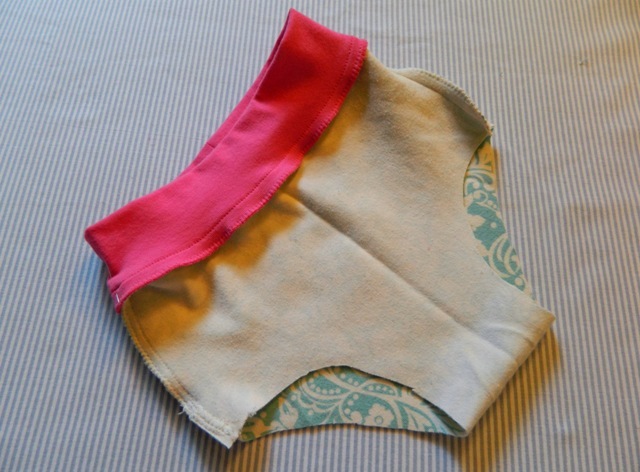
Fold your panties right sides together and sew the side seams. When you turn your panties turned right side out they will look like this.

Let's move on to the leg and waist bands.
Sew the waist band ends right sides together with a simple seam. Fold it in half so that the seam is on the inside or wrong sides together.


Keep your panties right side out and put the presser foot on the inside edge of the panty fabric so that you can ease in the extra fabric. Sew (beginning at the side seam) all the way around the waist stretching the waist band just enough so that there is an equal amount of fabric. Now zigzag around catching all the layers. It should now look like this.
If yours does then you're ready to put on the leg bands. Put the leg bands in exactly the same way. Put the pins in the band and around the legs and match them up. Stretch just a little while you sew around the leg and then zigzag.


There is only on thing left to do to complete your panties. Leave the panties right side out and stitch the legs and waist bands on the inside as close to the edge while staying inside of the zig-zag.

Look at the inside and outside stitching. You'll have to look close to see the stitching.

TA DA you’ve finished. Make yourself a cup of tea and admire your work.

Panty liner instructions: Using a scrap, lay the panties on top of the fabric and trace the leg opening with a washable marker or just cut out the opening.

Then cut it out free hand so that it looks like this.

Zig-zag the curved top and stitch the top and bottom of the liner piece and then sew the curved top and bottom right onto the panty. No need to do the sides they will be secured when you attach the leg bands. Now scroll back up to the top.
Hi,
ReplyDeleteI really want to make a pillow case dress for your charity, but I am curious on what size pillow case to buy. Also if i bought fabric how much yardage? And what width bias tape do you use?
If you but a standard pillowcase or 1 yard of fabric that would be plenty. Check out my tutorial on "how to make the best dress ever" in my January 2012 archive listed on the right hand side of this screen. I have a material list and some information about suitable fabrics. If you have additional questions please don't hesitate to contact me at DressAGirl@charlottesville.net.
ReplyDeleteThere are many kinds of panties.You can buy it online@hot166.com.
ReplyDeleteI am interested in patterns for panties (mentioned above by haoyii) but the online name and address is incomplete. can you re-post where to buy patterns?
ReplyDelete
ReplyDeleteWow Very Nice Post I really like This Post.Please share more post.letest blouse designs
I’ll bookmark your blog and take a look at once more right here regularly. VisitChinese b2b platform
ReplyDeleteAs someone who’s always looking for ways to save on fabric and supplies, I recently discovered Hollister Student Discount they have some great deals that would be perfect for making projects like this!
ReplyDeleteIt's always wonderful to see such creative and thoughtful ways to help others. I’m sure many will find this helpful when making clothes for girls around the world. Top 7 Trendy Footwear Picks for Summer 2024
ReplyDeleteThank you!
ReplyDeletegothic shirts